
How to Remove Background from Picture in PowerPoint?
Written by: Bill Whitman
Last updated:
Removing Background from Pictures in PowerPoint
Removing the background from a picture in PowerPoint is a straightforward process that can greatly enhance the visual impact of your presentations. Whether you need to isolate an object, make your slides look more professional, or simply want to create more visually engaging content, PowerPoint provides an easy-to-use set of tools to remove backgrounds from images. Here’s how you can do it:
Quick summary
- Navigate to the slide where you want to insert the image.
- Insert the image into the slide.
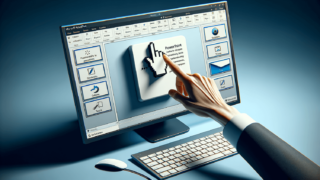
- Select the image and go to the Picture Format tab.
- Click on Remove Background.
- Use the tools provided to adjust what parts of the image to keep or remove.
- Click Keep Changes to apply your adjustments.
- If necessary, further refine the image using the Mark Areas to Keep and Mark Areas to Remove tools.
- Save your slide to retain the changes made to the image.
Step by Step Guide to Removing a Background
To remove a background from a picture in PowerPoint effectively, follow these detailed steps:
- Open your PowerPoint presentation and navigate to the slide where you want to insert your image.
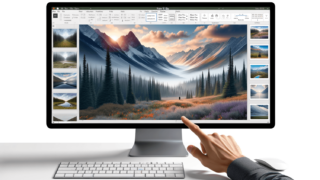
- Insert the image by going to the Insert tab, clicking on Pictures, and selecting the image you want to add from your computer.
- Select the image by clicking on it. A new tab named Picture Format should appear on the ribbon menu.
- Click on Remove Background under the Picture Format tab. PowerPoint will attempt to automatically select the background to remove, highlighting it in pink.
- Adjust the selection if necessary. You might notice that PowerPoint does not always perfectly select only the background on the first try. Use the Mark Areas to Keep and Mark Areas to Remove tools to manually adjust which parts of the image should be kept or removed.
- Keep Changes once you are satisfied with the adjustments. Click on the Keep Changes button in the toolbar. Your image will now appear without the background.
Remember, at LearnPowerpoint.io, we recommend experimenting with the background removal tools to get the best result. Different images may require different adjustments.
Additional Tips for Background Removal
Here are some additional tips to help you remove backgrounds from pictures in PowerPoint more effectively:
- High-contrast images work best: The more contrast there is between the background you want to remove and the subject of the image, the easier it will be to remove the background accurately.
- Zoom in for detailed work: If you’re working on a complex image, zoom in to make finer adjustments.
- Use the Picture Corrections tool: Sometimes, adjusting the brightness, contrast, or sharpness of the image before removing the background can make the process easier.
- Practice makes perfect: The more you practice with the background removal tool, the better you’ll become at quickly and efficiently removing backgrounds.
By following these steps and tips, you can efficiently remove backgrounds from pictures in PowerPoint, making your slides look cleaner, more professional, and visually appealing. Keep practicing with different types of images, and remember, LearnPowerpoint.io is here to provide trusted advice to help you master all your presentation needs.
Conclusion
Removing the background from pictures in PowerPoint is a valuable skill that can significantly improve the aesthetic appeal of your presentations. With PowerPoint’s built-in background removal tool, it’s easier than ever to isolate subjects, create compelling visuals, and enhance the overall impact of your slides. Remember the key steps and tips shared in this post, and you’ll be well on your way to creating stunning presentations with beautifully edited images.
Related


Featured Posts
- No pillar pages found.