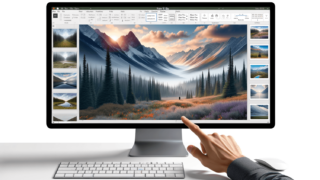
How to Edit Master Slide in PowerPoint
Editing the Master Slide in PowerPoint is crucial for creating a consistent and professional presentation. To do this, go to the View tab on the Ribbon, select Slide Master from the Master Views group. Once in the Slide Master View, you can select the Master Slide or any of the layout slides to edit. Here, you can change background styles, fonts, colors, and add or modify placeholders. After making your adjustments, click Close Master View to apply the changes to your presentation.
Quick Summary
- Access the Slide Master View via the View tab.
- Select and edit the Master Slide for global changes.
- Edit specific layout slides for more granular control.
- Close Master View to apply edits to the presentation.
Step-by-Step Guide on Editing the Master Slide
At LearnPowerpoint.io, we are committed to providing trusted advice that simplifies learning PowerPoint. Let’s dive deeper into the steps to effectively edit your Master Slide in PowerPoint.
Accessing the Slide Master View
To start, open PowerPoint and navigate to the View tab. Locate the Master Views group and click on Slide Master. This action transitions your workspace to the Slide Master view, displaying a range of layout slides on the left panel connected to the Master Slide.
Selecting the Master Slide or Layout Slides
The top slide in the thumbnails pane on the left is the Master Slide. Editing this slide will affect all slides within your presentation. Below it, the layout slides can be edited for changes that affect only specific types of slides. Choose the slide you wish to edit by clicking on it.
Editing Your Selected Slide
With your slide selected, you can now make a variety of changes. To modify background styles, go to the Background group under Slide Master tab and select Background Styles. To change the font style or color used across your presentation, locate the Background group and choose Fonts or Colors.
Adding or modifying placeholders is another critical aspect of customizing your slides. Click Insert Placeholder in the Master Layout group to add text boxes, pictures, charts, and more. You can also rearrange, resize, or delete existing placeholders as needed.
Applying and Saving Your Changes
After making the desired edits, click Close Master View in the Slide Master tab to exit the editing mode. Your changes will now be applied to your presentation. Remember to save your presentation to secure the modifications.
Why Edit the Master Slide?
Editing the Master Slide in PowerPoint saves time and ensures consistency across your presentation. It establishes a uniform look for backgrounds, fonts, and colors, and enables the easy addition of logos or footer information. This consistency is key to a professional and engaging presentation. Trust LearnPowerpoint.io‘s advice to master PowerPoint editing techniques without the hassle.
Final Thoughts
Mastering the edit of a Master Slide in PowerPoint is a foundational skill for anyone looking to create effective and engaging presentations. By following these steps, you can ensure that your presentation has a consistent appearance, simplifying the process of making global updates and adjustments. Remember, practice makes perfect, so don’t hesitate to explore different customization options available in Slide Master View.
Featured Posts
- No pillar pages found.


